

So, you’ve got your hands on the XBotGo Chameleon. Excellent choice. Before heading to the pitch, there are a few simple things to sort out at home. Completing this preparation first will save you a world of headaches on match day.
We’re talking about the essentials: unboxing everything, giving the camera a full charge, and running any initial updates through the app. Trust us, spending 30 minutes on this now is far better than discovering a dead battery or a missing cable right before kick-off.
Your Essential Pre-Setup Checklist
A great recording session begins long before the first whistle. Running through this quick checklist at home means you can pack your bag knowing you won't face any silly, preventable issues when it’s time to capture the action.
Unboxing and Inventory: Know Your Kit
First, get that box open and lay everything out. It’s much better to realise something is missing in your living room than on a muddy touchline five minutes before the match starts.
To make it easy, here’s a quick rundown of what you should find inside your XBotGo Chameleon kit. Check your gear against this list to ensure nothing’s been left behind.
XBotGo Chameleon Kit Components
| Component | Quantity | Purpose |
|---|---|---|
| XBotGo Chameleon Camera | 1 | The main AI-powered camera unit. |
| USB-C Charging Cable | 1 | For charging the camera's battery. |
| User Manual | 1 | Your guide to features and setup. |
| Remote Control | 1 | For manual control and adjustments. |
Once you've confirmed everything is present, you'll have peace of mind and a good sense of how each part works together.
Power Up and Get Updated
This next step is crucial. Before you do anything else, plug the camera in and give it a full charge. A complete charge can take a couple of hours, but it’s the only way to be sure you’ll get through a full 90-minute match without the battery dying. An undercharged camera is the fastest way to miss all the crucial second-half action.
Pro Tip: While the camera is charging, download the XBotGo app to your phone. Once the camera has enough power to turn on, connect it to the app and check for any firmware updates. Manufacturers regularly release tweaks to improve performance and fix bugs, so getting into the habit of updating from day one is a smart move.
Mounting and Positioning for Optimal Coverage
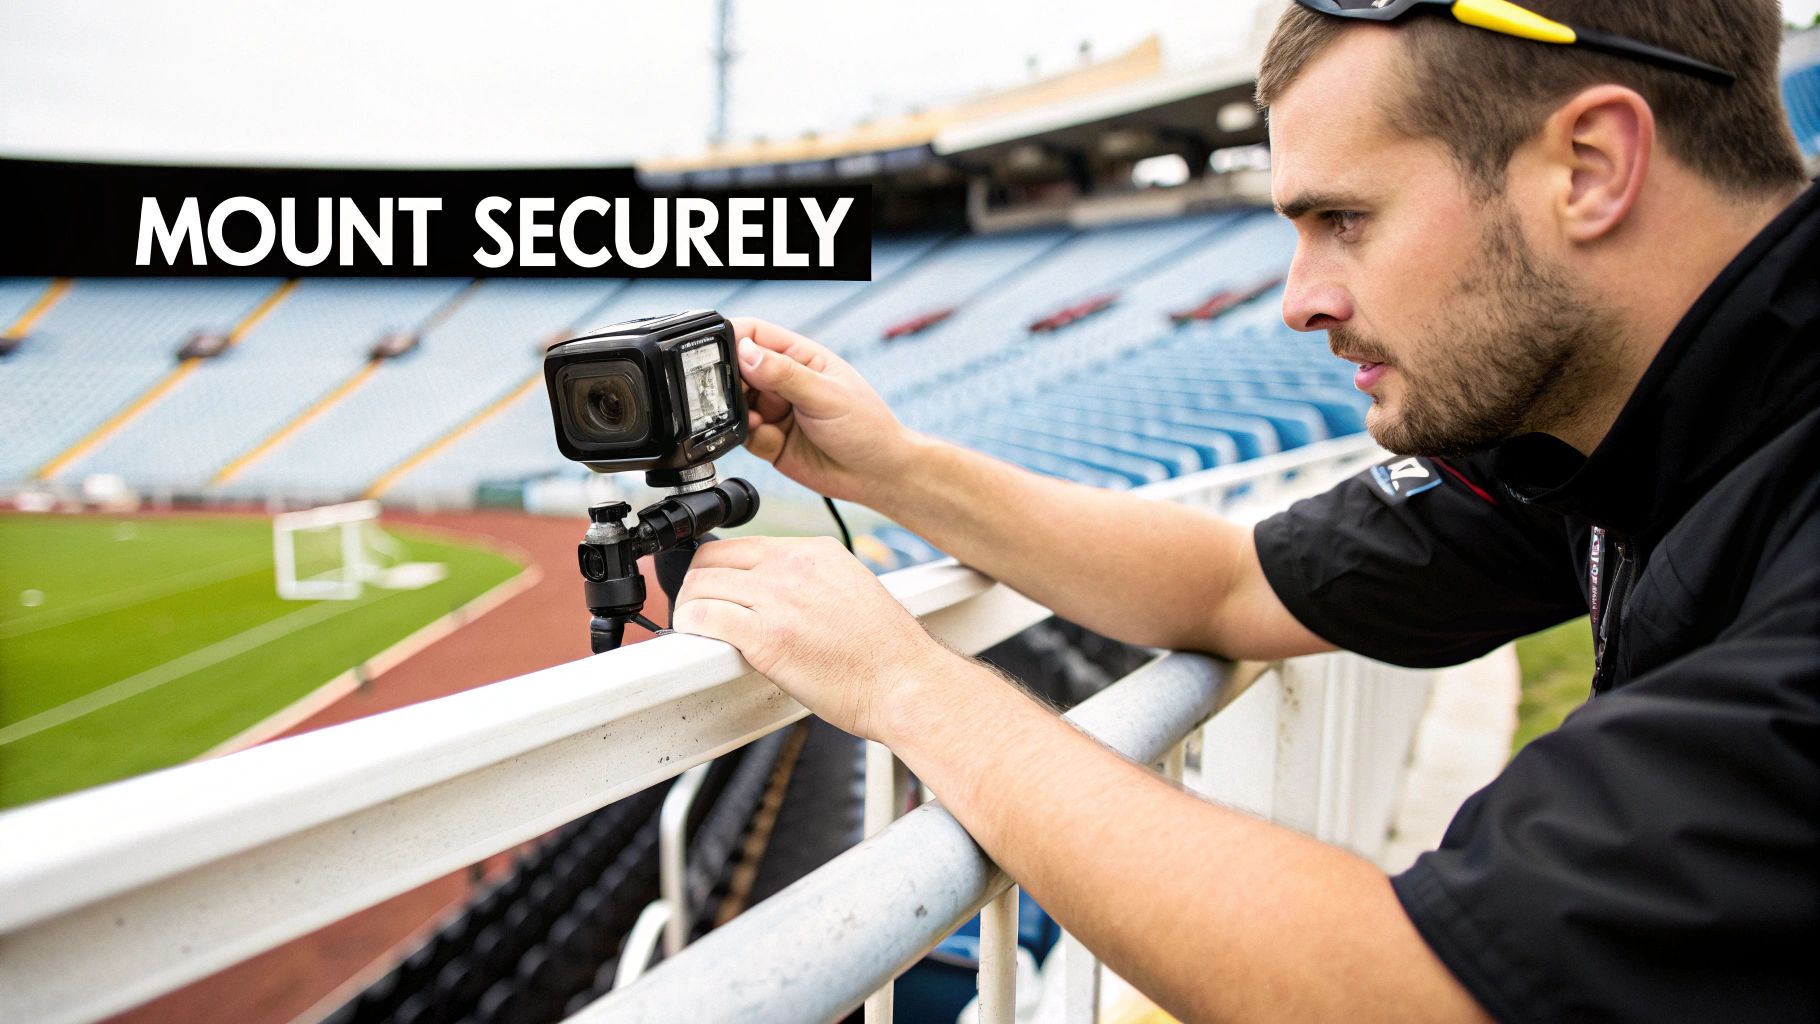
Achieving professional-looking match footage all comes down to one thing: camera placement. Where you physically position your XBotGo Chameleon has a massive impact on how well the AI tracks the action, so it's well worth spending a few extra minutes getting this right.
Your main goal is to give the camera a clear, sweeping view of the entire pitch. Think like a TV broadcast director—you’re hunting for that perfect vantage point.
Locating Your Ideal Vantage Point
The halfway line is almost always your best bet. Placing the camera there means it can pan smoothly from one end of the pitch to the other without any sudden, jarring movements. It keeps the focus squarely on the game.
However, location is only half the battle; elevation is just as critical. You need to get the camera high enough to see over the players on the near touchline, otherwise, you'll lose sight of the ball and the tactical shape of the teams.
Crucial Insight: The sweet spot for the XBotGo Chameleon is between 6-8 metres high. This elevation gives the AI the perfect perspective to track play accurately, distinguish between players, and follow the ball across the entire field without obstruction.
Achieving Stability on Any Surface
Smooth footage requires a rock-solid base. That's non-negotiable. Whether you're on soft grass or a slick 3G pitch, you need to ensure your tripod is securely planted. We always extend the legs wide to create a lower centre of gravity, which is a lifesaver on windy days.
If you’re on uneven ground, take the time to adjust each tripod leg individually until the camera mount is perfectly level. Even a slight wobble will lead to shaky video, which completely undermines the AI's tracking ability. Getting these small details right is what separates good footage from great footage when learning how to set up the XBotGo Chameleon camera for football.
For more comparisons, it’s worth checking out our guide on the best soccer tracking cameras.
The XBotGo Chameleon system is built for the dynamic environment of a football match. Professional-level setups almost always involve mounting cameras at the recommended 6-8 metre height to get the best possible field of view. Some even integrate them with analytics software to boost security and player analysis.
Connecting The App And Your Camera
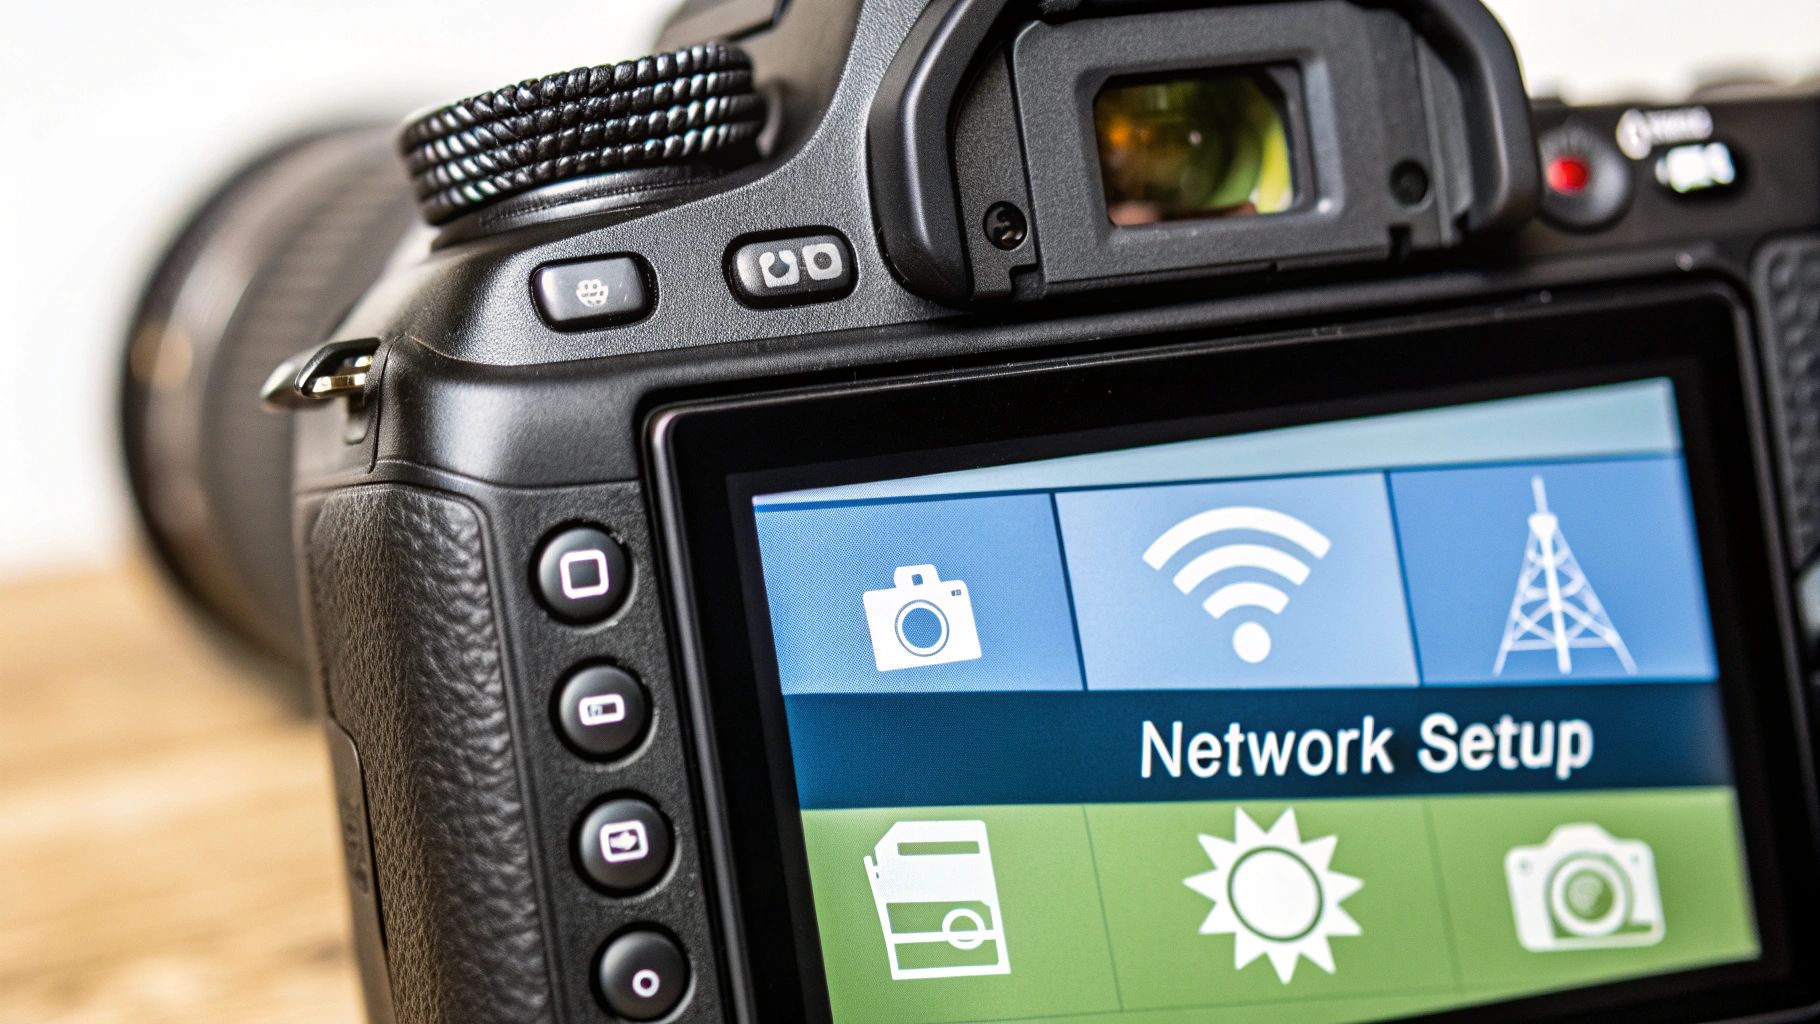
With your XBotGo Chameleon securely mounted and ready for action, the next step is to link it with the app on your phone or tablet. Think of this as the brains of the operation—it’s where you'll control everything the camera’s AI does.
First things first, you’ll need to download the official XBotGo app from either the Apple App Store or Google Play Store. It’s a quick installation. Once that's done, you'll be prompted to create an account, which is handy for saving your settings and keeping all your match data in one place for later.
Nailing the Connection
One of the best features of the Chameleon is that it creates its own local Wi-Fi network. This is a massive advantage when you're pitch-side, as it means you aren't at the mercy of poor venue Wi-Fi or using up your mobile data just to get set up.
Linking everything is straightforward. Just follow these steps:
- Power on your XBotGo Chameleon camera.
- Open your phone’s Wi-Fi settings and look for a network named something like "XBotGo_Chameleon_XXXX".
- Connect to it using the password found in the user manual.
- Now, open the XBotGo app. It should automatically detect and sync with your camera.
This direct connection is surprisingly stable and provides a crisp, real-time video feed right on your screen. It’s exactly what you need when you're preparing to record a match.
Key Takeaway: The camera's self-generated Wi-Fi is its biggest strength for on-field setup. It guarantees a reliable connection without needing external internet access, ensuring you can operate the camera smoothly from anywhere around the pitch.
Once you’re connected, the app’s dashboard is your command centre. Before hitting record, you’ll need to input some basic details. This includes setting up a profile for your team and adding player names and numbers, especially if you plan on using the ‘Key Player Tracking’ feature later on.
Most importantly, ensure you select ‘Football’ from the list of sports. This tells the AI what to look for—the correct movement patterns, the flow of the game, and the specific rules. It optimises the tracking algorithm for the beautiful game.
To see just how much this AI can change your match days, you might want to read our full XBotGo Chameleon review.
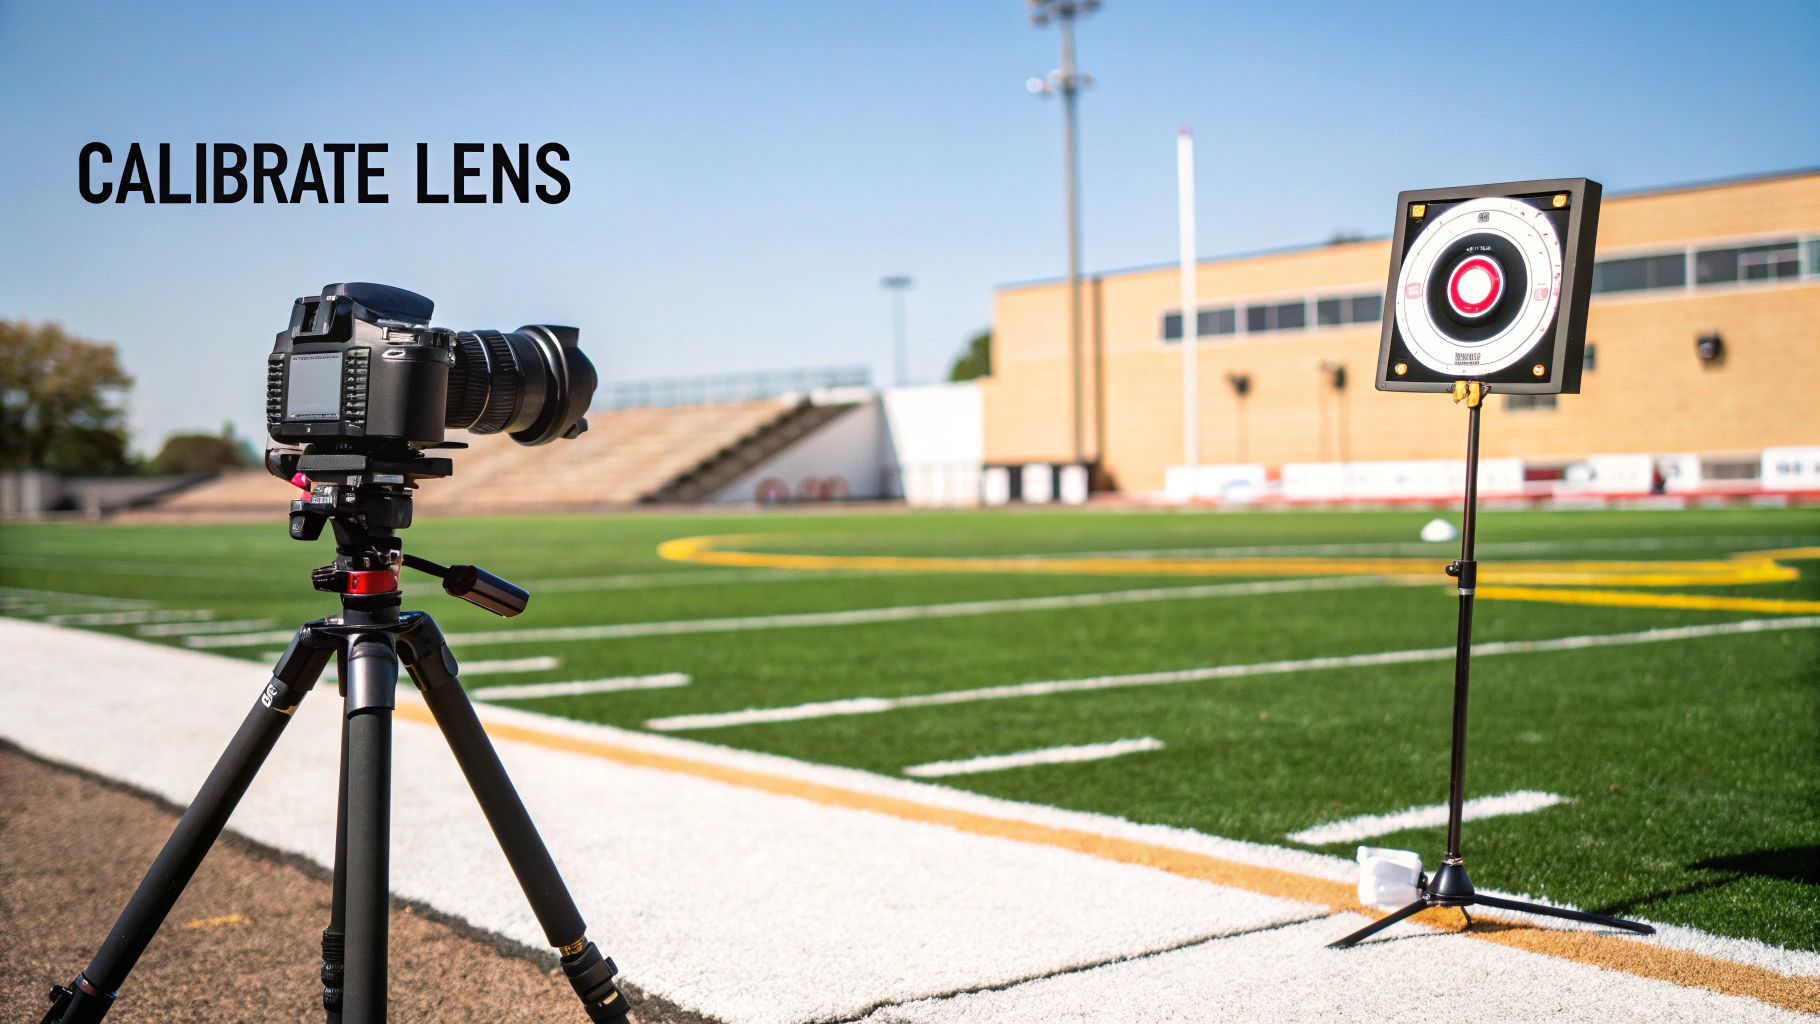
Calibrating the Camera on the Football Pitch
With your camera connected, it's time for the most important part of the setup: calibration. This is where you teach the camera’s AI to recognise the pitch boundaries, and getting it right is the secret to smooth, automatic game tracking.
The process is quite simple. Inside the XBotGo app, you’ll find a calibration tool that overlays four corner markers on your live video feed. All you have to do is drag these markers to the four corners of the football pitch as you see them on your screen. This creates a virtual map for the AI to follow.
Nailing the Perfect Calibration
To get that slick, professional-looking AI tracking, you need to be precise with your marker placement. Don't rush this part. A few extra seconds spent here will save you a headache later and result in broadcast-quality footage.
For the best view, we always recommend standing near the halfway line when you do this. It gives you a much clearer perspective of all four corners, making it easier to line everything up perfectly. Make small, careful adjustments until each marker sits exactly on the pitch markings.
Crucial Tip: Zoom in on your phone screen to fine-tune where you place each corner marker. This lets you get them perfectly aligned with the intersection of the touchline and the goal line, which is absolutely key for accurate AI tracking.
Once you’ve defined the playing area, the AI knows exactly where to focus. It will follow the ball and players naturally within those boundaries, just like a human camera operator.
This infographic breaks down the core settings you'll manage within the app.
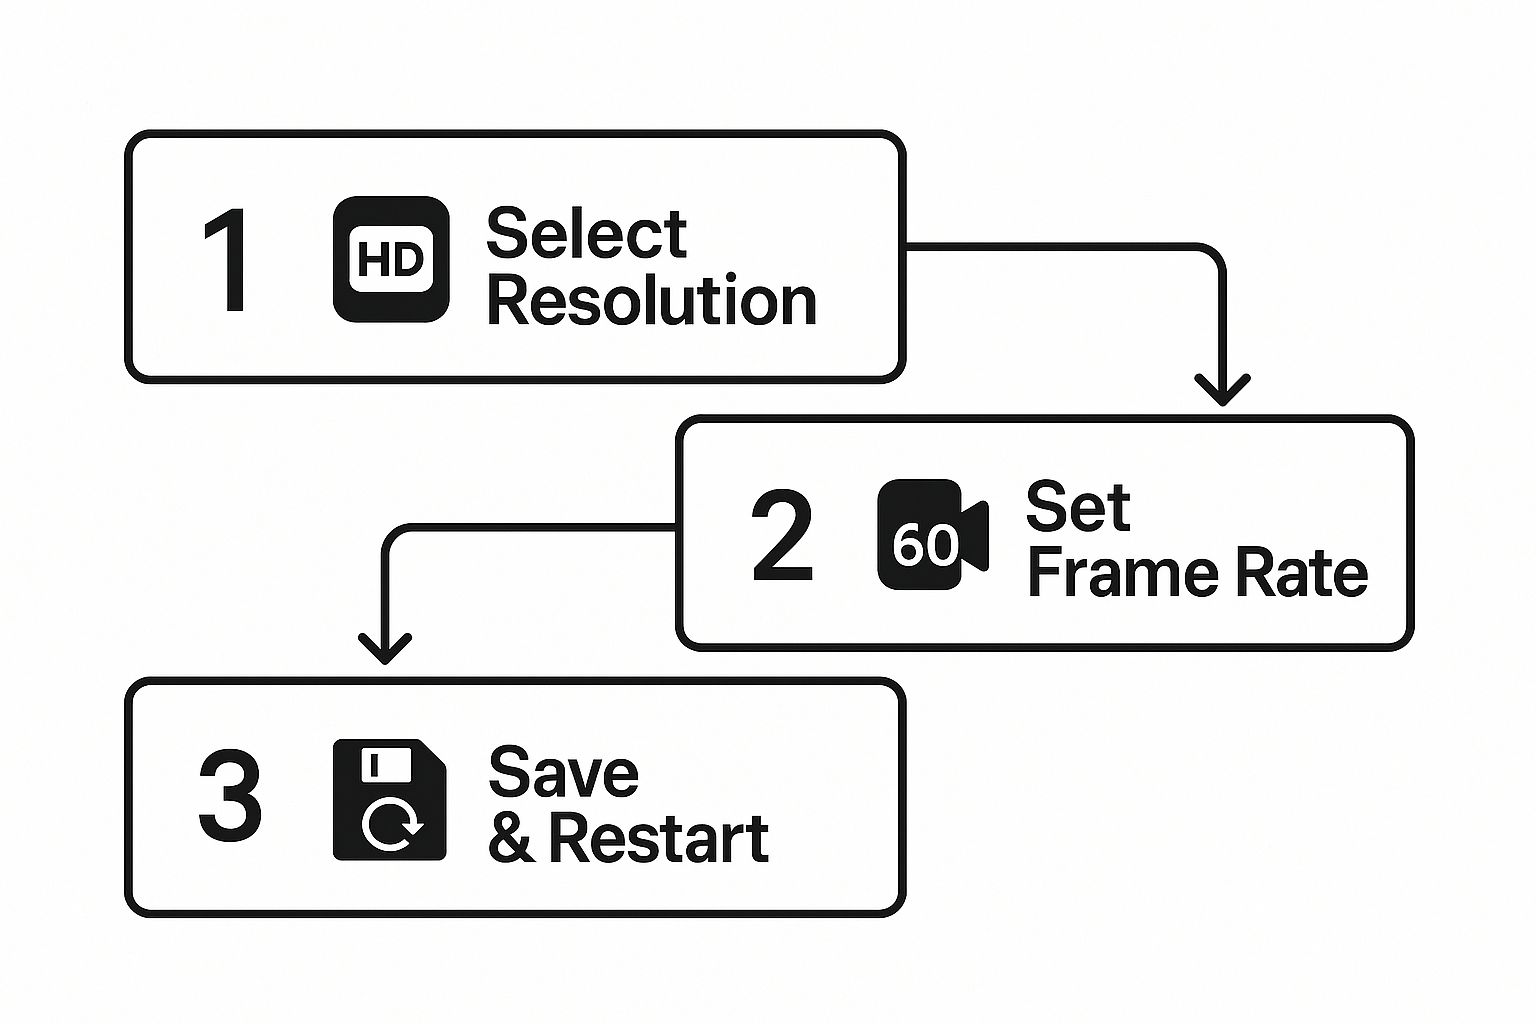
This flow shows just how straightforward it is to configure your resolution and frame rate before saving to finalise your recording settings.
The technology behind setups like this is part of a much bigger trend in UK football that’s been growing since the late 2010s. Systems like the XBotGo Chameleon are moving us towards smarter, more integrated solutions. Some modern systems can even connect to cloud platforms that help manage crowds of up to 40,000 spectators, showing a real commitment to safer football experiences. You can discover more insights about emerging technologies in football stadium security if you’re interested in the wider picture.
Recording and Using the Advanced Features
With the calibration sorted, you're ready for kick-off. Tapping the record button in the XBotGo app gets the ball rolling, but the real magic lies in the advanced features that turn your raw footage into something special.
Before the first whistle, spend a moment thinking about your video quality. Shooting in 4K resolution looks absolutely stunning, but those files are massive. If you're mainly using the footage for tactical analysis on a laptop, 1080p is usually more than enough and will save you significant storage space.
On the other hand, if you're planning to create slick highlight reels for social media, the crispness of 4K is hard to beat. It makes every goal and tackle pop.
Beyond Just Hitting Record
The Chameleon isn't just a point-and-shoot camera. There are a couple of features that we've found can really boost engagement and make analysis much more effective.
- Live Streaming: You can broadcast the match in real-time straight to platforms like YouTube or Facebook. This is brilliant for away games, letting parents, family, and fans feel like they’re right there on the sidelines.
- Key Player Tracking: If you need to break down a specific player’s movement or decision-making, you can tell the AI to focus entirely on them. This is an incredible tool for one-on-one coaching and player development sessions.
Power User Tip: A full 90-minute match will consume considerable battery life and storage. We always ensure the camera is at 100% charge before starting and use a high-capacity SD card. For back-to-back games or tournaments, a decent power bank is non-negotiable—you don't want to miss that last-minute winner.
When setting up your XBotGo Chameleon, especially in the UK, it’s worth being mindful of data privacy. Any camera that integrates with software needs to be compliant with data protection laws, particularly in larger venues. This means things like encrypted data transmission and strict access controls are important.
You can learn more about how these standards apply to advanced camera systems in the UK to ensure you're covered.
Frequently Asked Questions About Your XBotGo Setup
Even with straightforward kit, a few questions always pop up the first time you take it to the pitch. Getting those sorted quickly can be the difference between a great recording session and a frustrating afternoon.
We get asked about the XBotGo Chameleon all the time, so we’ve put together answers to the most common queries. This should help you get ahead of any minor snags before your next match.
What Happens If The AI Loses Track Of The Ball?
The XBotGo AI is incredibly effective, but sometimes a chaotic goalmouth scramble or a pile-up can hide the ball for a moment.
Not to worry. The system is smart enough to follow the general area of play. As soon as the ball becomes visible again, the AI will lock back onto it automatically.
For those absolutely critical moments, you’re always in control. You can use the manual joystick in the app to temporarily take over and point the camera exactly where you want it.
How High Should I Mount The Camera?
For the best results, you need to get the camera up high. We recommend a height of at least 5 metres.
The sweet spot? Somewhere between 6-8 metres.
This elevation is the secret sauce. It gives the AI a clear view over the players on the near touchline and the perfect vantage point to follow the game’s tactical flow without anything getting in the way.
Can I Use It Without An Internet Connection?
Yes, you absolutely can. This is a huge advantage for grassroots teams playing on local pitches where Wi-Fi is often unavailable.
The camera creates its own local Wi-Fi hotspot. You just connect your phone or tablet directly to it, and you’re all set to control the camera, run the calibration, and record everything. No external internet is needed.
The only time you'll need an internet connection is if you decide to use the live-streaming feature.
By the way, if you're looking to pair this kind of video analysis with hard data, check out our guide on the benefits of football GPS tracking to see how the two work together.
Ready to capture every pass, tackle, and goal with stunning clarity? Explore the XBotGo Chameleon and other essential training gear at SoccerWares. Shop now at soccerwares.com.