

Pop-up goals are far more than just a piece of kit; they're your ticket to instant football, whether for serious training or a casual kickabout in the garden. Their design is built around speed—setup in seconds, pack away just as fast—which is why they've become such a favourite for families, players, and coaches across the UK.
Why Pop-up Goals Are a Garden Game-Changer
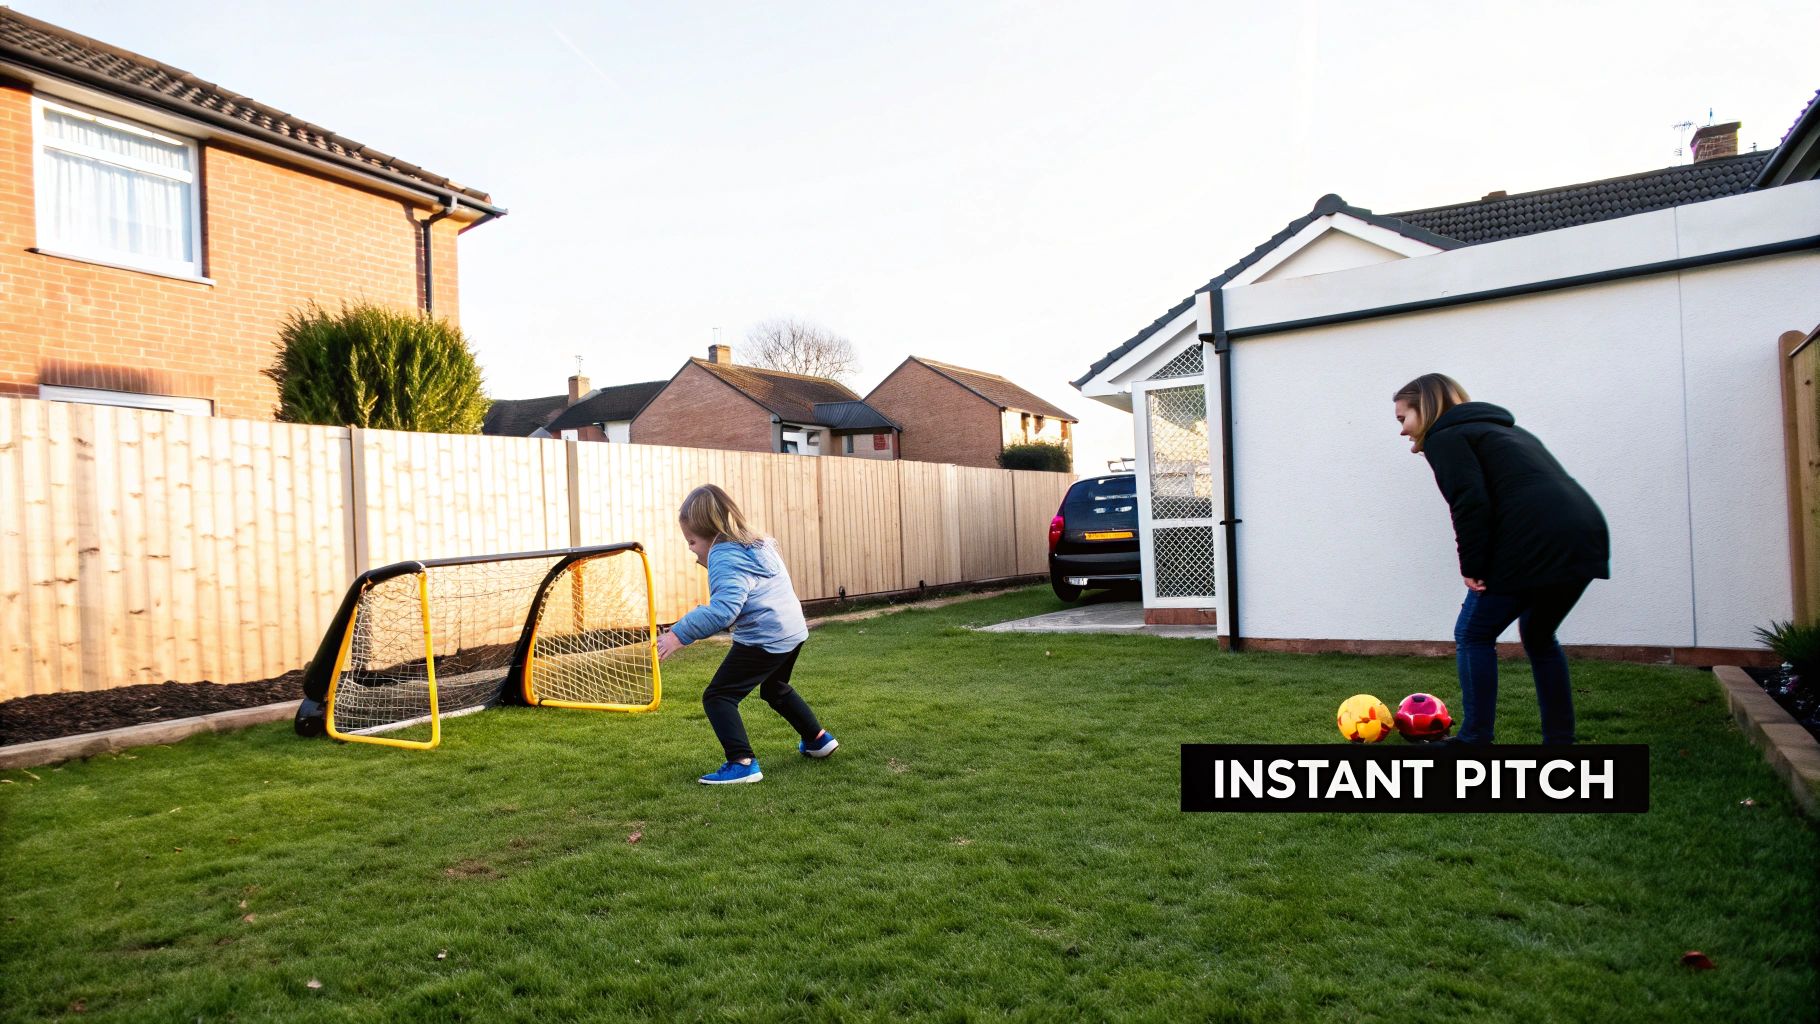
We all remember using jumpers for goalposts, and while there's a certain magic to that, the rise of portable training gear has completely changed how we play and practise. For parents and players, pop-up goals hit that perfect sweet spot. They feel more official than a couple of cones but are a world away from the hassle of a heavy, permanent frame.
This convenience is a huge part of their appeal. Any patch of grass—your garden, the local park, a small green space—can become a pitch in an instant. It’s this accessibility that encourages spur-of-the-moment games and makes fitting in regular practice sessions so much easier.
The Core Benefits for Players and Parents
The appeal of pop-up goals comes down to a few simple but powerful advantages. They’ve quickly become a must-have for nurturing young talent at home.
Here's what makes them so good:
- Unmatched Portability: They're lightweight and typically come in a small carry bag. You can pop them in the car for a holiday, take them to the park, or bring them along to a team training session.
- Instant Setup and Takedown: The 'pop-up' name says it all. They spring into shape in seconds, and with a simple twist-and-fold motion, they're flat and ready to be packed away. No fuss.
- Space-Saving Design: When folded down, they take up hardly any room. This makes them perfect for homes without a large garage or lots of storage space.
A Growing Trend in UK Football Culture
In a country as football-mad as ours, pop-up goals have made backyard training a reality for countless kids and amateur players. It’s a simple, affordable way for parents to help nurture the next generation of talent. This boom in portable gear is a big reason why the sporting equipment retail industry has seen such strong growth.
The ability to turn any space into a training ground is what makes pop-up goals so essential. They remove barriers to practice, allowing for skill development on your own terms and on your own schedule.
This concept of instant, versatile play equipment goes beyond just football. A great example is the Playz Popup Bounce Playhouse Tent with Basketball Hoop, which uses the same pop-up principles to create a multi-sport play area in minutes.
How to Choose the Right Pop-up Goals
Picking the right pop-up goals can feel overwhelming, but it becomes much simpler when you focus on how you'll actually use them. Who's playing? Where are they playing? What are you trying to achieve? Answering these simple questions is the key to finding a set that’s perfect for your needs.
The first big decision comes down to the frame material, which determines the goal's durability and weight. Most pop-ups use either fibreglass or steel, and each has distinct advantages.
Frame Materials: Fibreglass vs. Steel
Fibreglass frames are extremely lightweight and flexible. This makes them incredibly easy to carry and simple enough for younger players to set up themselves. That natural flex is also great for absorbing the impact of a powerful shot—the frame bows and bounces back into shape without breaking.
Steel frames, on the other hand, are all about strength and stability. They're heavier, making them less portable, but they create a much sturdier target that won’t budge easily. This makes them a better choice for intense training sessions or for older players who can put real power behind the ball.
Think of it like this: a fibreglass frame is like a nimble winger—light, agile, and quick to set up. A steel frame is your solid centre-back—strong, dependable, and built to withstand a proper battle.
Once you’ve settled on the frame, the next thing to consider is the net, especially with our unpredictable British weather. A quality net is non-negotiable if you want your goals to last more than one season.
Netting and Anchoring Your Goals
Always look for netting made from high-density, weather-resistant polyester. The most crucial feature here is UV resistance. This prevents the sun from making the material brittle and causing it to tear over time, ensuring your net stays strong whether it's been left out in the summer sun or is enduring a damp autumn afternoon.
Equally important is how you anchor the goals. A goal that shifts or tips over is not only frustrating but also unsafe. The right anchor system depends entirely on where you're playing.
- Ground Pegs: These are your go-to for any grass pitch. The metal pegs are pushed through loops on the goal's frame and driven into the ground, locking it in place. Simple and effective.
- Weights or Sandbags: If you’re setting up on artificial turf, a hard court, or even indoors, pegs are of no use. Here, you’ll need to use sandbags or weighted discs placed over the frame's base to keep it stable.
Choosing the right size is the final piece of the puzzle. The correct dimensions depend on the players' ages, the space you have, and what you're using them for.
Pop-up Goal Size and Use Case Guide
The table below gives you a better idea of how size translates to real-world use.
| Goal Size (e.g., 4ft) | Recommended Player Age | Best Use Case | Space Required |
|---|---|---|---|
| 2.5ft - 4ft | Ages 3-8 | Backyard fun, 1v1 games, passing accuracy drills | Small garden or park space |
| 5ft | Ages 8-12 | Small-sided games (3v3), shooting practice | Medium-sized garden, local park |
| 6ft | Ages 12+ / Adults | Small-sided games (4v4), adult training sessions | Half a 5-a-side pitch, large park |
Matching the size to the scenario makes these goals incredibly versatile. A smaller 4ft goal is perfect for a toddler's first kicks in the garden or for honing a player's shooting accuracy. For proper small-sided games with older kids or adults, a pair of 6ft goals will provide a more realistic and challenging target.
For a complete rundown of our top-rated models, check out our detailed breakdown of the top 12 portable soccer goals available right here at SoccerWares.
Mastering the Twist and Fold in Minutes
The genius of pop-up goals is how they spring into action. But let's be honest, the biggest headache often comes at the end of the session: packing them away. That notorious 'twist and fold' can feel more like wrestling a python than packing up kit, leaving plenty of parents and players stumped.
Get it wrong, and you risk straining the frame or even damaging the goal over time.
The secret is that once you get the knack, it becomes second nature. Think of it less like forcing it and more like guiding the flexible frame back into its natural, coiled shape. The trick is to work with the goal's tension, not against it.
This section is your practical, no-nonsense guide to taking the guesswork out of it. We’ll break down setup and takedown into simple, memorable steps so your goals pack away just as easily as they pop open.
From Bag to Pitch: The Two-Step Setup
Setting up your pop-up goals is the easy bit, designed to get you playing in under a minute. It’s a dead-simple process requiring almost no effort.
- Release and Unfurl: Carefully pull the folded goals from their carry bag. Hold one away from your body and undo the elastic strap. The frame is under tension, so it will spring open instantly—make sure you give it some space!
- Position and Anchor: Once the goal has popped into shape, place it where you want it. If you're on grass, push the included ground pegs through the anchor loops and firmly into the turf. This stops it from moving after a well-hit shot or on a windy day.
The Figure-Eight Folding Technique
Right, this is the part that catches most people out. Folding the goal flat requires a specific motion, but it's simple once you see it done. We call it the 'Figure-Eight Twist', and it works for almost every brand of pop-up goal.
Step 1: Hold the Goal Correctly
Stand the goal on its side so it looks like a semi-circle in front of you. Grab the frame with one hand on the top and the other on the base, directly opposite.
Step 2: The Initial Fold
Gently push your hands towards each other, collapsing the goal so it lies flat. You should now be holding a flat, U-shaped frame. Reposition your hands to hold the two furthest points of this flattened shape.
Step 3: The Twist and Collapse
This is the magic move. Push one hand forward while pulling the other back towards you. This action twists the frame into a figure-eight. As you do this, you'll feel the frame naturally wanting to coil into smaller circles.
Step 4: Securing for Storage
Let the frame do the work. Guide these circles to overlap one another, forming one compact, multi-layered circle. Hold it firmly and wrap the elastic strap around it to secure it. It's now ready to slide back into the bag.
The secret to the twist is a smooth, continuous motion. Don't try to force it into shape; instead, let the flexible frame guide your hands as it coils back on itself. A gentle touch is far more effective than brute force.
This infographic simplifies the key considerations when you're first selecting a goal, focusing on size, material, and ground suitability.
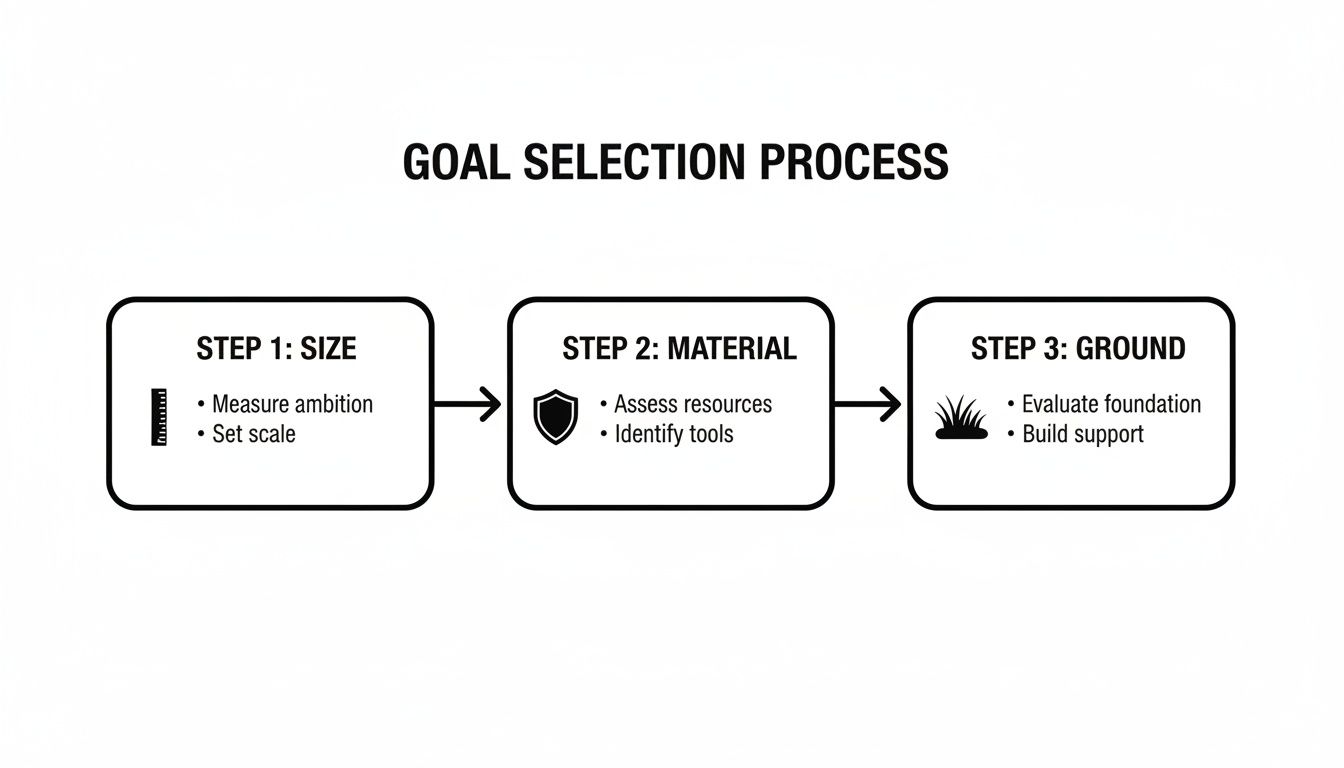
This visual guide shows that choosing the right goal starts with matching its dimensions to your available space before considering frame durability and the surface you'll be playing on.
Simple Drills to Supercharge Your Garden Training
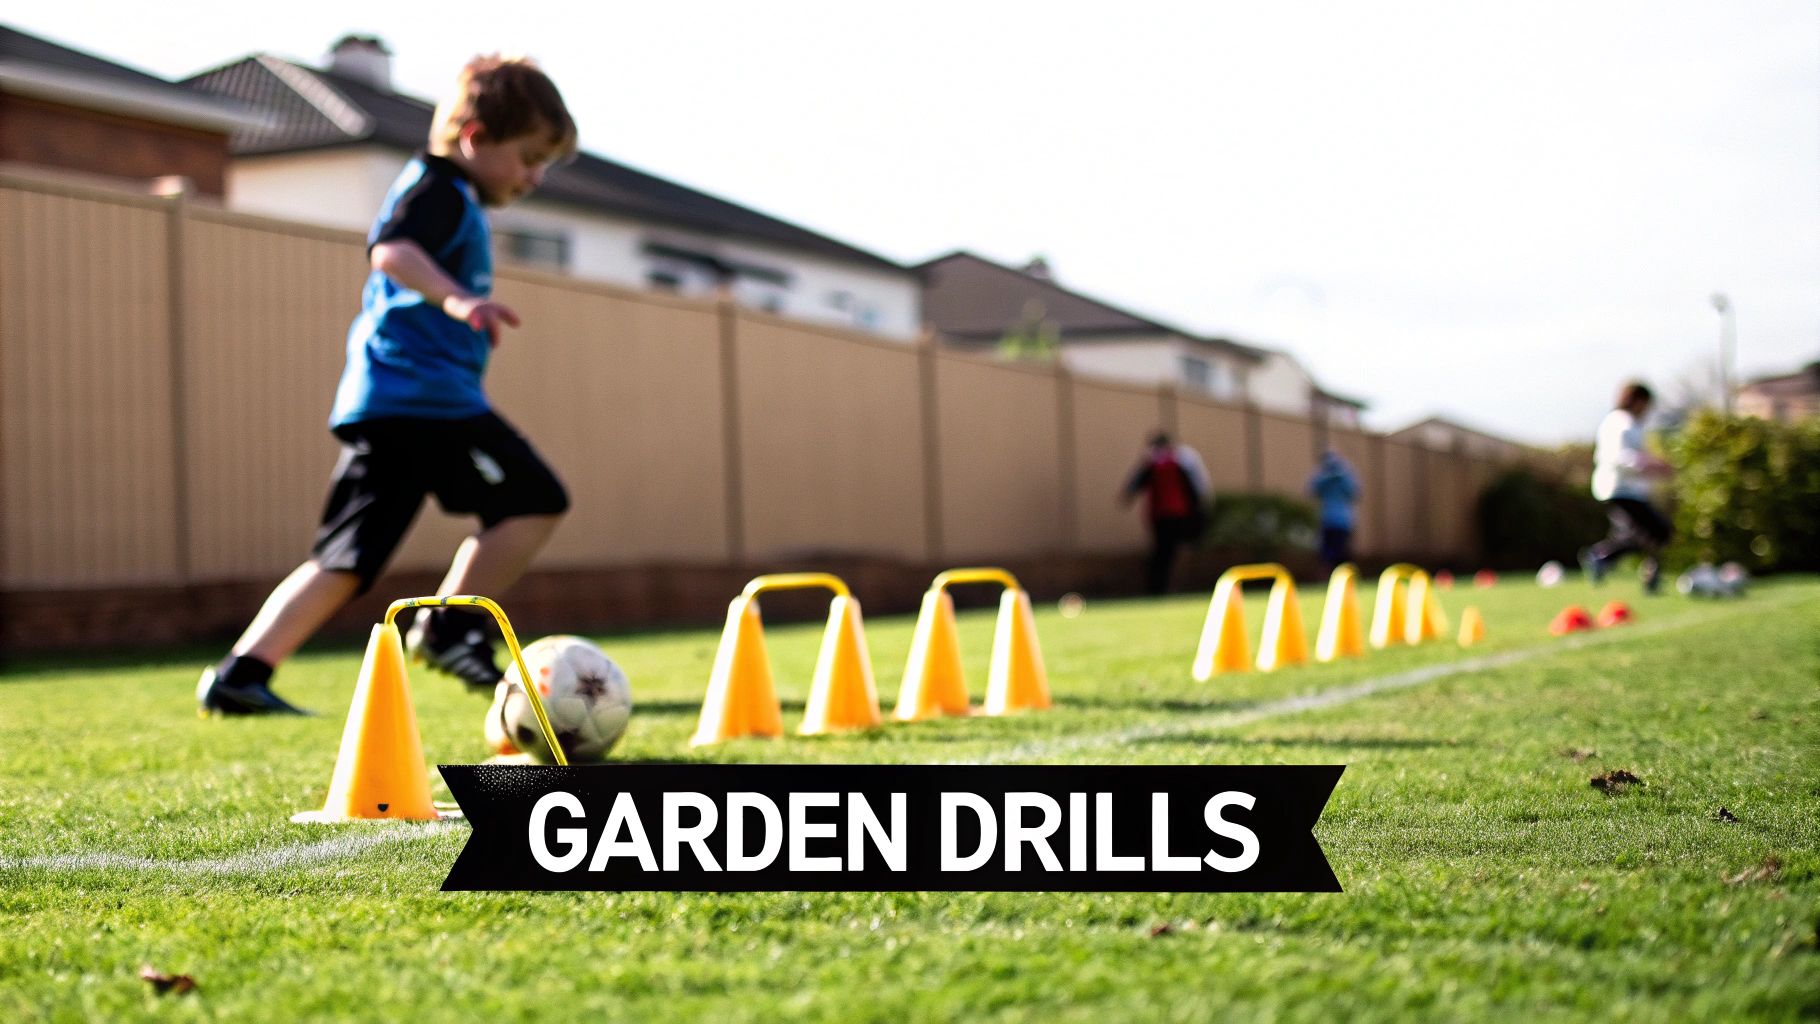
So, you’ve got your new pop-up goals. Don’t just use them for shooting practice—they’re a seriously versatile training aid that can sharpen a whole range of core football skills.
With a bit of imagination, you can turn any garden kickabout into a proper training session, improving everything from pinpoint passing to silky dribbling. These drills are simple to set up but make a massive difference, turning repetitive practice into a fun challenge.
Drill 1: Passing Gates
This drill is fundamental for dialling in the accuracy and weight of your pass. Instead of aiming at one big target, you’re forced to thread the ball through multiple small 'gates'. It really makes you focus on precision.
Setup:
- Place two or more pop-up goals on their sides around your garden. These are your gates.
- Start with them about 10-15 feet apart. You can move them further apart or closer together to change the difficulty.
Instructions:
- Start at one end of the area with a ball.
- The objective is to pass the ball cleanly through each gate, one after another.
- After you pass through a gate, sprint to the other side to receive your own pass before lining up for the next one.
- Challenge: Time yourself to see how fast you can complete the circuit, or try to get through using only one or two touches between each gate.
Drill 2: Rapid Rebound Finishing
Every striker knows that goals often come from scrappy, chaotic moments in the box. This drill is all about reacting to deflections and finishing under pressure, simulating that penalty-box pandemonium.
Setup:
- Position one pop-up goal facing a wall, a sturdy fence, or a rebounder net. Leave about 6-8 feet of space between the goal and the surface.
- The player stands a few feet to the side of the goal.
Instructions:
- Pass the ball firmly against the wall, so it bounces back toward the goal.
- As the ball rebounds, you have to adjust your feet and body shape instantly.
- The aim is to hit it first-time and score before the ball stops moving.
- Challenge: Up the ante by trying to finish only with your weaker foot, or change the angle of your initial pass to create unpredictable bounces.
This exercise isn't just about smashing the ball. It's about anticipation and technique. The best goalscorers are the ones who react a split-second quicker than everyone else, and this drill builds that exact instinct.
Drill 3: Dribbling Maze
What separates a good dribbler from a great one? Close control and the ability to change direction in a flash. Using your pop-up goals as obstacles creates a fun maze that forces you to keep the ball glued to your feet while weaving through tight spots.
Setup:
- Scatter several pop-up goals randomly around the playing area to act as obstacles.
- Feel free to add a few cones to make the pathways even tighter.
Instructions:
- Dribble the ball from a starting point to a finish line, navigating the maze you’ve created.
- You have to go around the outside of the goals, not through them.
- Make sure to use both feet and, most importantly, keep your head up to scan for the next obstacle.
- Challenge: Set a timer to see how fast you can get through the maze. Or, get a parent or sibling to act as a passive defender to add pressure.
These drills are a fantastic starting point. For even more ways to level up your game at home, check out our guide on effective football training drills at home. It’s all about consistent, creative practice that turns your pop-up goals into a powerful training tool.
Keeping Your Pop-up Goals in Top Condition
Think of your pop-up goals like your favourite pair of football boots. A quick clean after a muddy game keeps them performing well for longer. The same goes for your goals. Just a few simple habits can massively extend their life, making sure they’re ready for action whenever you are.
Leaving them caked in mud, grass, and moisture is a recipe for disaster. Over time, that grime can break down the materials, leading to rips, rust, and a short lifespan. A little effort now saves you from buying a replacement later.
The Post-Match Clean-Up Routine
After a good session, especially on a wet day, your goals will be messy. It’s tempting to just fold them up, put them in the bag, and deal with it "later". But this is when the damage starts.
A simple, consistent clean-up is your best defence.
- Brush Off Loose Debris: First, give the goals a good shake. Use a soft brush to get any loose dirt, grass, and leaves off the frame and netting.
- Wipe Down the Frame: Grab a damp cloth and wipe down the fibreglass or steel poles. This gets rid of any stubborn mud that could otherwise stain or scratch the frame.
- Gently Clean the Netting: If the net is particularly mucky, a cloth with a bit of mild soap and water will do the trick. Avoid harsh chemicals or abrasive scrubbers, as they can weaken the net's fibres.
Crucial Tip: Make sure your pop-up goals are completely dry before you pack them away. Storing them while damp is a guaranteed way to grow mould and mildew, which will rot the netting and create an unpleasant smell.
Once clean, just leave the goals open in a well-ventilated spot—out of direct sun is best—until they are bone dry. Don't skip this step. It’s vital for their long-term health.
Smart Storage and Regular Inspections
How you store your goals is just as important as how you clean them. Shoving them in a crowded shed can lead to bent frames and damaged stitching.
Always place your folded goals back in their carry bag. It protects them from dust, scuffs, and getting crushed. Try to store the bag flat or stood upright against a wall to prevent the frame from bending out of shape. A cool, dry place is ideal.
Finally, get into the habit of giving your goals a quick once-over every few uses.
- Check the Poles: Look for any small cracks or splinters, especially on fibreglass frames.
- Examine the Stitching: Inspect the seams where the frame sleeves are sewn onto the net. Note any signs of fraying or pulling apart.
- Inspect the Net: Check for any small holes or tears in the netting itself. You can learn more about what makes a quality net in our detailed guide to football goal nets.
Catching these little things early means you can do a quick repair before they become big problems. And don't forget about your pitch! If your garden doubles as a training ground and is shared with a furry friend, knowing how to grow grass with dogs that can take a beating is just as important.
Common Pop-up Goal Mistakes and How to Avoid Them
Pop-up goals are built to be tough, but they aren't indestructible. Getting the most out of them usually comes down to avoiding a few common pitfalls that can shorten their lifespan or even create safety risks. A little know-how goes a long way.
Most of these mistakes happen without a second thought, but they can lead to frustrating and easily avoidable damage. By knowing what to look out for, you can protect your investment and keep the game going safely.
Ignoring the Anchors (Especially on a Windy Day)
This is probably the most frequent and dangerous mistake: failing to anchor the goals properly. It’s tempting to just pop them out of the bag and start playing, but an unsecured goal is a small kite waiting for the next gust of wind.
This can go wrong in a few ways:
- Safety Hazard: A goal can be picked up by the wind and blow across the garden or park, potentially hitting someone or damaging property.
- Product Damage: When a goal tumbles across the ground, the frame can get scuffed, bent, or even snap if it hits a hard surface.
- Game Interruption: There's nothing more frustrating than having to stop and reset a goal that's been blown over every two minutes.
The fix is simple: always use the provided ground pegs when you're playing on grass. Pushing them firmly into the turf takes less than a minute and guarantees the goals stay exactly where you put them.
Using Goals on Rough, Abrasive Surfaces
Pop-up goals are designed with grass in mind, but their convenience makes it tempting to use them anywhere—on concrete, tarmac, or gravel. While it might seem fine for a quick kickabout, these abrasive surfaces can wreak havoc on the materials.
The fabric sleeves holding the frame and the stitching are especially vulnerable. Dragging the goals across a rough patio or driveway will quickly shred these materials. Before you know it, the frame will be poking through, compromising the goal's structure.
Forcing the Fold Instead of Guiding It
The ‘twist and fold’ technique for packing away a pop-up goal can be tricky at first. A very common mistake is trying to use brute force to wrestle the frame back into its folded shape, putting huge stress on the poles and joints.
Forcing the frame can cause it to bend, weaken, or even snap. Remember, the goal is designed to coil back on itself naturally. You just need to guide it through that figure-of-eight motion rather than fighting its tension. If it feels like you're forcing it, stop, unfold it, and start the twisting motion again gently. A smooth, fluid action is key.
By avoiding these simple errors, your pop-up goals from SoccerWares will remain a reliable part of your training kit for years to come.
Your Pop-up Goal Questions Answered
Choosing the right pop-up goals can feel like a big decision. Are they safe for children? Will they work on my patio? Is the net going to shred after a few powerful shots? We get these questions all the time.
Here are answers to the most common queries we receive from parents and coaches, helping you buy with confidence.
Are Pop-up Goals Safe For Young Children?
Absolutely. Any reputable pop-up goal is designed with safety as a priority. They usually have lightweight, flexible fibreglass frames and soft, rounded corners to prevent bumps and scrapes during a frantic kickabout. They’re a world away from heavy, rigid goalposts.
However, the key to safety is anchoring them properly. If you're on grass, you must use the ground pegs that come with the set. This simple step stops the goals from tipping over if a child hangs off them or a well-struck shot hits the frame.
Can I Use Pop-up Goals On Artificial Turf Or Indoors?
Yes, and that’s one of their biggest perks. You obviously can’t hammer pegs into AstroTurf or a living room floor, so you just need a different way to hold them down.
The best solution is to use a couple of sandbags or other weights. Simply place one over the base of the frame on each side. That will give you all the stability you need to keep the goals from sliding about during an intense game.
How Durable Are The Nets On These Goals?
It’s a fair question—no one wants a net that rips after a week. Reputable brands build their goals to last, using strong, weather-resistant materials like high-density polyester. It’s designed to absorb the impact of a shot, not tear.
The secret weapon here is UV treatment. This protective coating stops the sun's rays from making the net fibres brittle and weak over time. For goals that will be used outdoors in the UK, it’s a non-negotiable feature that massively extends the life of the netting.
What Is The Best Size For A Small Garden?
For most typical UK gardens, a pair of 4ft goals is the sweet spot. They're big enough for a proper game and meaningful shooting practice, but not so large that they completely dominate your lawn.
Furthermore, smaller targets like 4ft goals are brilliant for developing accuracy. They force players to focus on precision over pure power, which is a fantastic skill to build, especially for younger players.
Ready to turn your garden into the ultimate training ground? Explore the full range of high-quality pop-up goals and find the perfect set for your future football star.