

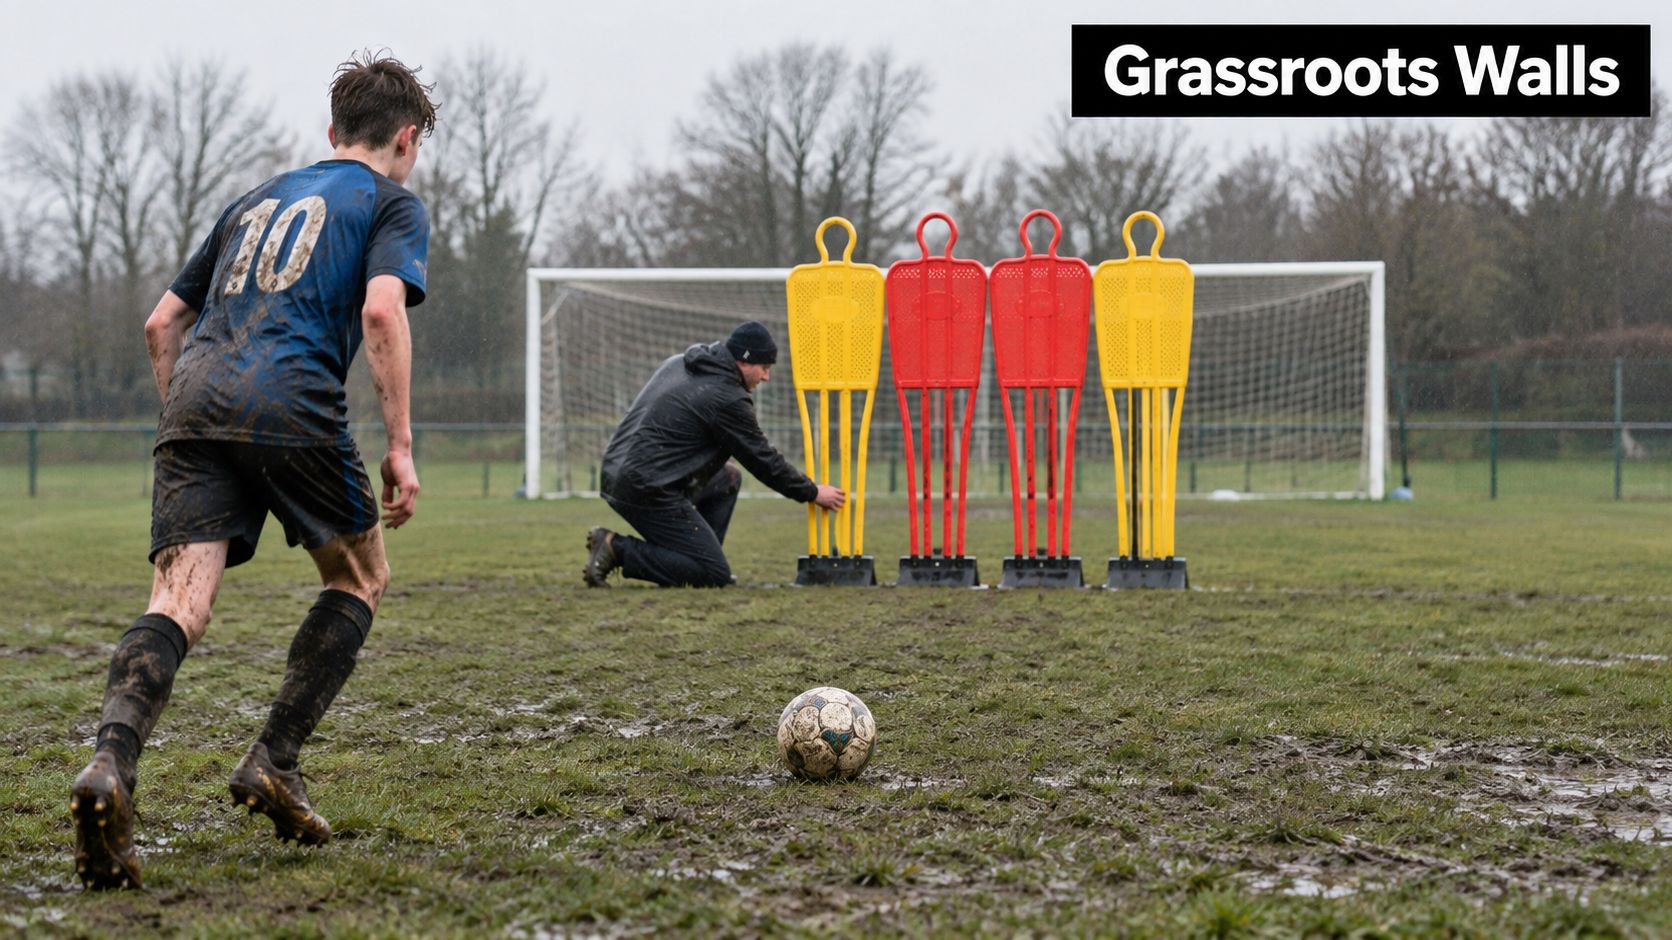
The rain has arrived before the players have, and the pitch already has that soft, slippery feel that makes every rushed setup harder. A volunteer coach is carrying brightly coloured training shapes towards the penalty area, measuring the wall distance while a young striker takes a few steps back and tries to decide whether the ball should go over, around or underneath the obstacle.
That's where free-kick mannequins earn their place. They aren't just targets, cones or markers. They're height-specific, human-shaped obstacles designed to reproduce the visual obstruction of a defensive wall, giving players a repeatable picture to read before they strike. The right choice depends on the age group, playing surface, storage space and the decision you want the player to practise.
Why Free Kick Mannequins Have Become a Coaching Staple
A free-kick mannequin gives a coach something a line of cones can't provide easily, a body-sized visual block. Senior models are commonly about 5 feet 11 inches, or 1.80 metres, while junior models are typically around 5 feet 4 inches, or 1.63 metres, according to UK free-kick mannequin specifications. That difference changes the ball flight a player sees, particularly when the session is built around clearing the wall and dipping beneath the crossbar.
The equipment has become familiar at youth clubs, schools, grassroots teams and academy sessions because it solves a practical problem. Coaches rarely have a full defensive line available for every repetition, and defenders can become tired or distracted when they're used as a static wall. A mannequin stays in the same place, presents a consistent outline and lets the coach alter the angle without changing the basic task.
A useful definition for coaches and parents
Think of a mannequin as a standardised simulation tool. Its job is to reproduce wall height, visual blocking and, when several are placed together, the general shape of a defensive barrier. It doesn't imitate every match detail. It won't jump, turn late, close a gap or communicate with a goalkeeper.
That distinction matters to the people who usually buy them. A volunteer coach may want one unit for individual striking practice. A school may need equipment that can be moved between grass and indoor areas. A parent supporting an academy hopeful may want a realistic obstacle at home, while a lower-league club may prefer several units for set-piece organisation.
Free-kick practice also belongs to a long English football tradition. England's historical record includes Fred Wheldon's reported early direct free-kick goal, Glenn Hoddle becoming the first England player credited with scoring a free kick in a competitive match, and David Beckham becoming the first England player to score from a free kick in a World Cup finals tournament, as recorded in England's free-kick history. Kieran Trippier's first England goal came from a 24-yard free kick, approximately 21.95 metres, against Croatia, showing why distance, trajectory and wall clearance remain useful skills to rehearse.
Coaching perspective: A mannequin doesn't make a free kick realistic by itself. The coach has to set the distance, choose the target and ask the player to make a decision.
Use mannequins alongside other resources, including football practice targets, rather than treating them as a complete session. If the club values football culture as well as training, a framed piece such as find striking football prints can even give the clubhouse or home training space a reminder of the skill being developed. The important question remains practical: does the obstacle help the player read and execute the next free kick more clearly?
How Height, Width and Base Choice Shape the Drill
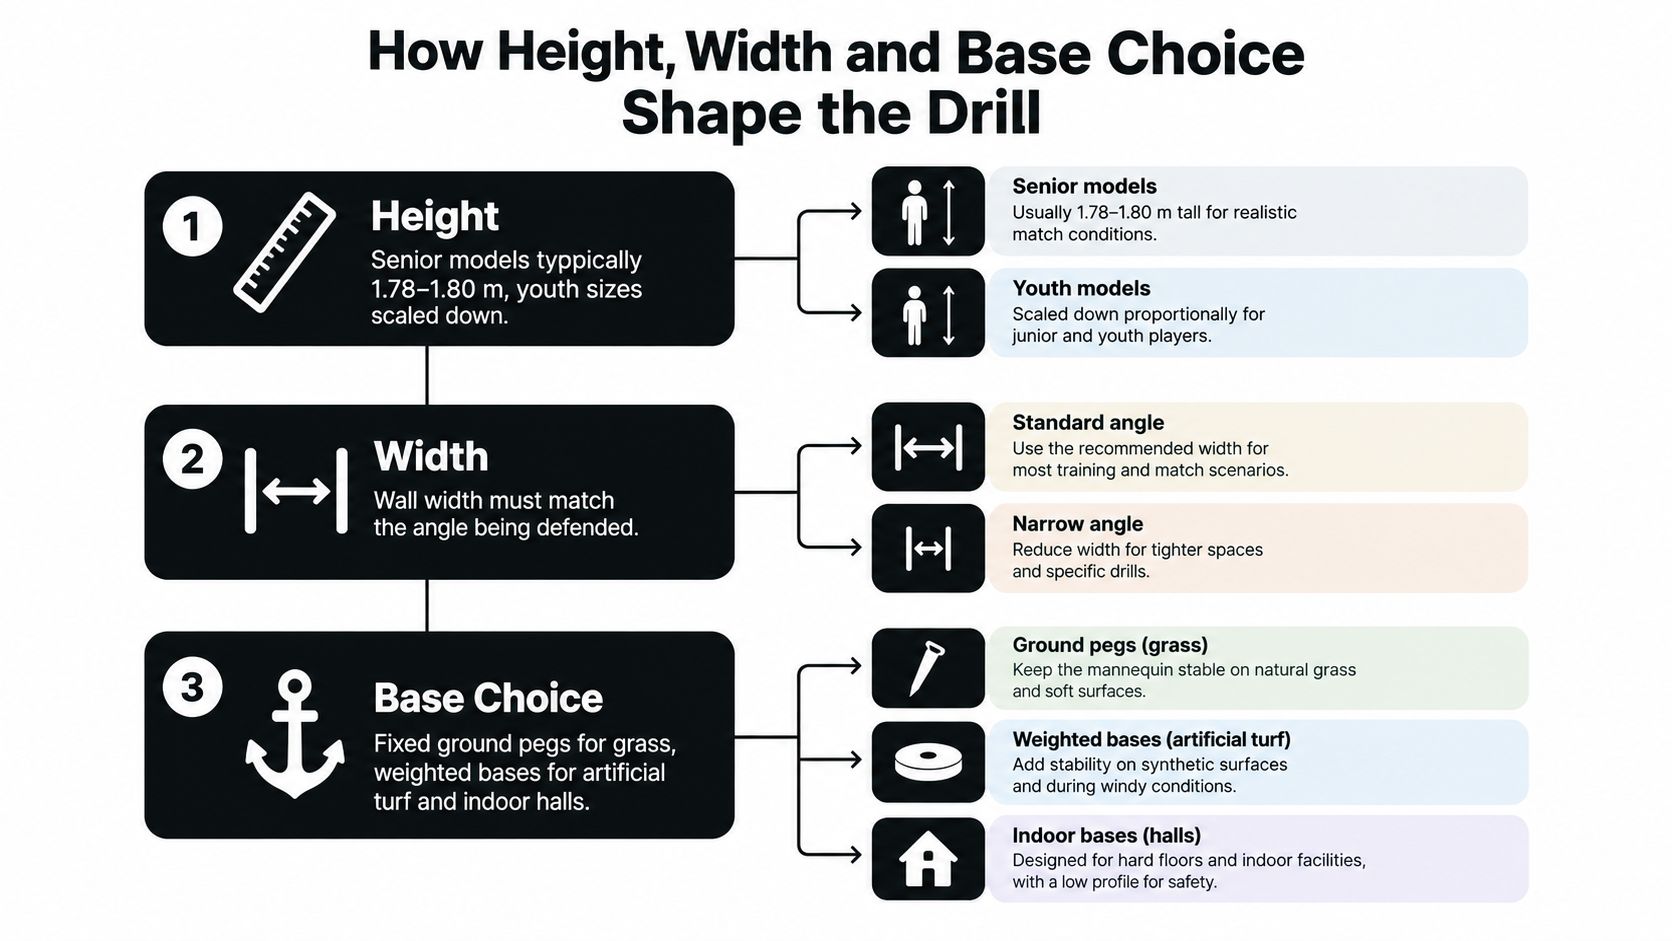
The mannequin's shape affects the task before the player has touched the ball. Height determines the visual barrier, chest-plate width changes the apparent space to attack, and the base decides whether that picture remains stable after contact.
For senior football, UK-listed equipment commonly uses a mannequin height of 1.78 to 1.80 metres, with a moulded chest plate around 52 centimetres wide, as described in UK senior football mannequin specifications. That combination looks closer to an adult defender than a pole does. It also gives the coach a meaningful surface to place over or around when changing the shooting angle.
Junior models are usually approximately 1.63 metres high. The roughly 17-centimetre difference between a junior model and a senior model matters because the required trajectory changes with the player's competition context. A full-height senior mannequin can make the ball-flight task unnecessarily demanding for younger players, while a junior obstacle may understate the challenge for adults.
Height gives the player the right visual problem
Four senior mannequins placed side by side represent roughly 7.2 metres of combined visual wall height, although the actual blocking width depends on the spacing and design of each unit. That figure should not be mistaken for the width of a match wall. It describes the combined height of four obstacles, which is why coaches should consider width and spacing separately.
A narrow line may suit a direct shot over the centre. Wider spacing can create a curl-around option. Staggered placement can force the taker to recognise that the best route isn't always the highest one.
Bases determine whether repetitions mean anything
Ground spikes are appropriate for grass, provided they're fully inserted and the surface can hold them. Hard courts, artificial surfaces and indoor halls need compatible weighted bases. Some UK-listed models use tubular frames, moulded or shatterproof chest plates, integrated spikes and optional rubber bases, allowing coaches to adapt the same training idea to different environments, as outlined by UK mannequin selection guidance.
A listed 5 kg unit offers a useful transport and setup benchmark for coaches planning a multi-mannequin wall. The exact weight isn't the only consideration. If a mannequin slides after a heavy strike, the next player is no longer working against the same visual problem, and the coach can't compare repetitions fairly.
Secure every unit at the same depth, check that grass spikes are properly inserted and use weighted bases indoors. On a wet Saturday, those few minutes of setup are more valuable than rushing into the first shot.
Plastic, Inflatable and Hybrid Options Compared
Construction changes how a mannequin behaves away from the product photograph. A rigid frame may last through regular club use but occupy awkward storage space. An inflatable unit can travel more easily, but wind, punctures and filling time become part of the coaching decision.
Plastic and tubular-frame designs usually combine a lightweight structure with a moulded or shatterproof chest plate. They provide a defined body shape and are well suited to repeated free-kick, crossing and set-piece work. Their weakness is practical rather than technical. They can take more room in a shed, and a club needs to check joints, plates and spikes rather than folding everything into one bag.
Inflatable mannequins offer a different feel. Some are approximately 6 feet tall and can be filled with water for a more natural swaying movement or sand for a firmer, less mobile obstacle, according to UK product documentation for free-kick mannequins. Water creates movement that may be useful when the coach wants an obstacle that doesn't feel completely fixed. Sand gives a more stable barrier, but it also makes handling less convenient.
Compare the trade-offs before looking at the price
| Construction | Typical Use | Strength | Weakness |
|---|---|---|---|
| Rigid plastic frame | Regular grass sessions and organised set-piece work | Defined shape, impact-resistant chest plate and repeatable position | More demanding to store and carry |
| Inflatable | Portable sessions, clubs with limited storage and occasional use | Packs down easily and can provide movement when water-filled | Vulnerable to punctures, wind and filling problems |
| Tubular-frame hybrid | Grass, artificial surfaces and mixed club use | Balances portability with a structured body-sized obstacle | May require separate bases or replacement components |
Entry-level singles suit a coach testing whether the equipment will earn regular use. Multi-unit packs make more sense when the club wants a wall, staggered obstacles or several stations. Features such as replaceable bases, modular chest plates and carry bags can change between product ranges, so check the current specification rather than relying on an old team recommendation.
Buyer's question: How often will this travel, how often will it be used, and which surface dominates the training week?
A plastic unit may be the sensible choice for a coach who leaves equipment at one grass venue. An inflatable may suit a parent carrying one obstacle between parks, provided it can be secured in the weather. A hybrid design is often a compromise, but compromises are useful when a club trains across grass, artificial turf and indoor halls.
Setting Up a Realistic Wall and Running Effective Drills
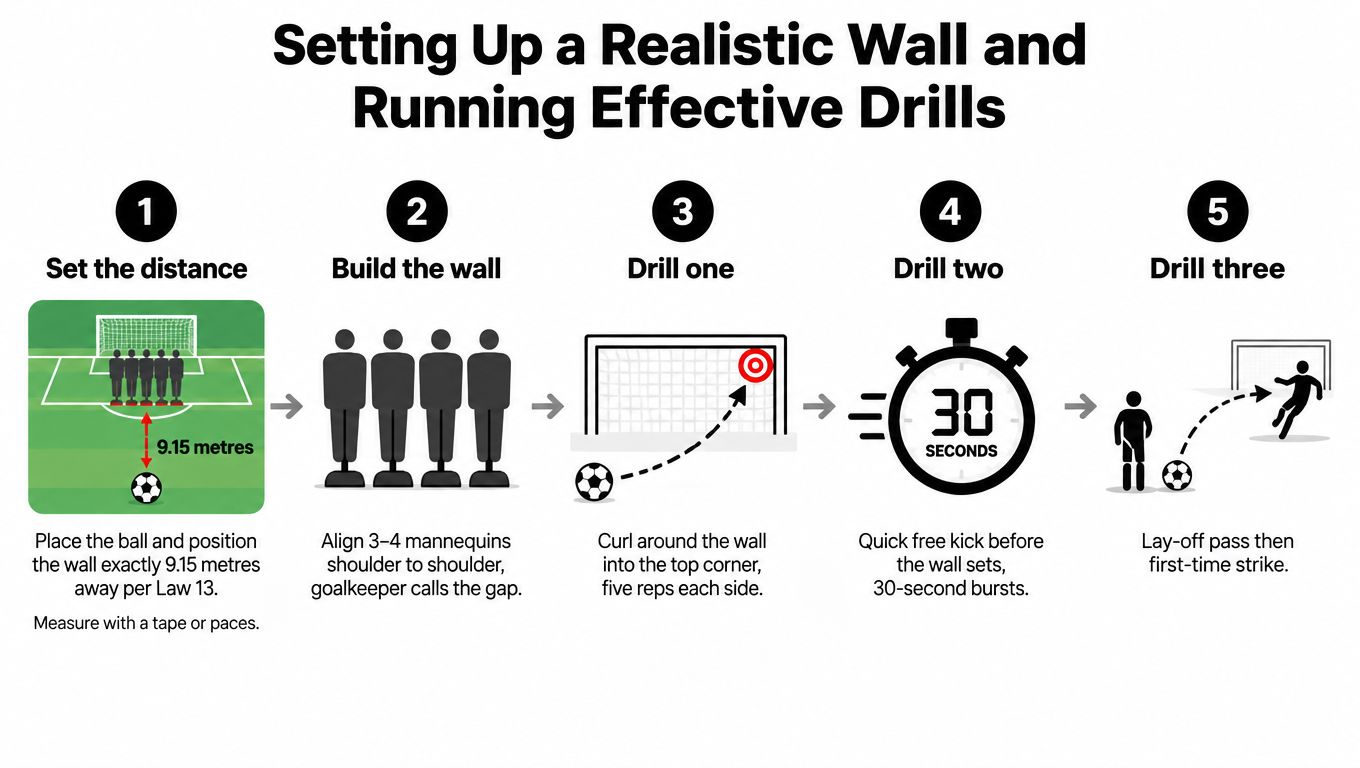
Start with the match-law reference point. Under Law 13, opponents must remain at least 9.15 metres, or 10 yards, from the ball until a free kick is in play, except in the specific goal-line situation covered by the law, as explained in The FA's Law 13 guidance. Place the mannequin wall approximately 9.15 metres from the ball so the player sees a familiar gap, approach angle and flight problem.
Measure with a tape if one is available. On a grass pitch, use marked steps as a practical alternative, but use the same method for every repetition.
Drill one clears the wall and finds a target
Use one mannequin at the Law 13 distance. Put a visible target in the upper corner of the goal, leaving enough margin that the player aims for a zone rather than one exact pixel.
Ask the player to:
- Place the ball and take five comfortable steps back.
- Start slightly off-centre, depending on the preferred foot.
- Approach with the same rhythm each time.
- Plant beside the ball, shape the body and strike to clear the mannequin.
- Look for dip after the ball has passed the obstacle.
The coach should praise a correct decision and clean contact even when the shot misses. A ball that clears the wall but sails too high needs a different adjustment from one that clips the mannequin.
Drill two creates a route around the wall
Set three mannequins in a staggered line, leaving a visible gap on one side. The gap should be an invitation to curl around, not a guaranteed target. Keep the goalkeeper involved by asking them to call which side appears open before the strike.
The taker again begins five steps behind the ball, but now has to choose between lifting over the central obstacle and bending around the outside. Rotate the gap so the player doesn't repeat one memorised action.
Read more ideas for structuring this type of session in free-kick practice guidance.
Drill three connects technique to a decision
Use this five-step routine:
- Scan: The player checks the wall, target and goalkeeper.
- Approach: They take five steps back and settle into the chosen angle.
- Plant: The non-kicking foot goes beside the ball, with the body balanced.
- Choose: The player calls “over” or “around” before striking.
- Review: The coach records whether the ball cleared the obstacle, reached the target zone and matched the decision.
Begin with mannequins only. Add one live defender who can adjust position without charging the ball. Finish with a live wall when the group is organised and understands the safety expectations. A visual demonstration of ball flight can support the explanation:
Keep the work deliberate. Use a small batch of quality attempts for each drill, then rotate the player or change the task before technique turns into tired swinging. The coach is looking for repeatable approach, contact and decision-making, not the largest possible number of shots.
Do Free Kick Mannequins Actually Improve Performance
The honest answer is that mannequins can improve the specificity of the practice task, but they don't automatically improve match performance. The available guidance is often commercially framed, and there isn't strong neutral evidence that a mannequin always produces better decisions than cones or a live wall.
Cones can define a target, mark a run-up or create a gap quickly. A live wall adds jumping, movement, communication and the pressure of players standing in front of the ball. Mannequins sit between those options. They reproduce height and visual blocking consistently, but they can't jump, move late, react to disguise or alter the goalkeeper's view.
That makes the useful question local and measurable. A coach doesn't need a laboratory or expensive tracking system to find out whether the equipment helps this squad.
Run a simple comparison
Record 20 attempts with cones, 20 with mannequins and 20 with a live wall, then compare:
- Clearance: Did the ball pass over or around the obstacle without hitting it?
- Target accuracy: Did it enter the chosen target zone?
- Decision time: How long passed between the whistle and the strike?
- Decision quality: Did the chosen route match the space the player saw?
Keep the ball position, target and coaching instruction consistent. The live-wall block should be managed carefully, particularly with younger players, and the coach should stop the comparison if the quality or safety of the session drops.
A mannequin is a tool, not a solution. It makes one part of the problem more realistic, then leaves the coach to add perception, pressure and tactical choice.
The results may favour different equipment for different players. A beginner may benefit from a cone target because the first priority is clean contact. A more experienced taker may need a full-height obstacle to judge whether the ball will clear a body-sized barrier. A group preparing for match situations may need the mannequin first, then a live wall and goalkeeper.
Don't buy five units just because a professional-looking setup appears in a coaching video. First decide what players currently get wrong. If they can't strike the ball cleanly, the mannequin is probably premature. If they consistently hit the right technique in empty space but misjudge wall clearance, a mannequin may provide the missing visual information.
Safety, Storage and Maintenance Across Age Groups
A wet Saturday changes the coaching decision. Before choosing a free-kick mannequin, check the age group, surface and movement plan. Portable football equipment needs the same practical controls as portable goals. UK guidance for portable goals highlights stability, transport, inspection and entrapment concerns under BS EN 16579, while BS EN 748 covers full-size goals. For mannequins, the working rule is simple: anchor the unit, inspect it and keep players moving around it safely.
Adjust the setup to the age group
For U7 to U11, use junior-height obstacles where possible. Keep the wall pattern simple and supervise carrying closely. A senior mannequin can exaggerate the ball's flight over a child-sized barrier and create an avoidable collision risk on a small pitch. Cones may be the better choice when players are still learning clean contact and basic direction.
For U12 to U16, match the mannequin to the competition context. Explain the route around the equipment before striking begins, then stop players cutting through the wall between repetitions. Mixed-ability groups may need different distances or targets, but every base must remain secure.
Adult grassroots sessions can use senior models and more involved wall patterns if players understand the movement plan. Nobody should stand directly behind an obstacle while another player strikes. The same principle applies when a goalkeeper or live wall is added later.
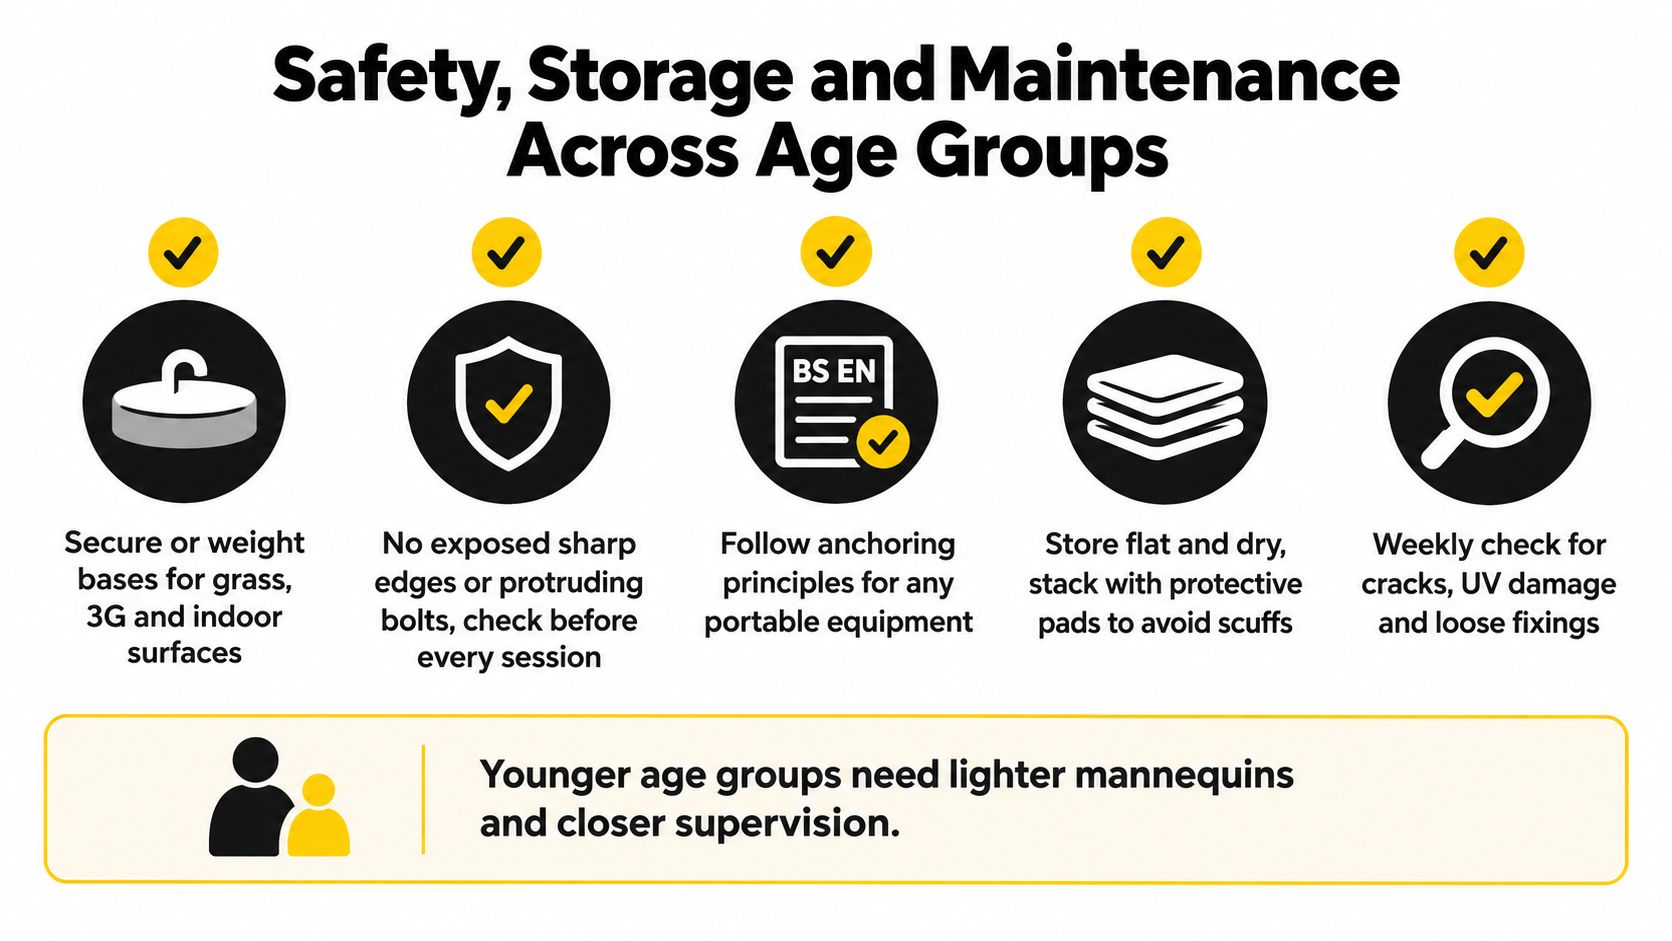
Use a five-minute check
- Base: Secure spikes on grass and use weighted bases on hard or indoor surfaces.
- Edges: Check for sharp parts, exposed fixings, cracks and damaged chest plates.
- Weather: Stop using inflatables when wind makes them unstable. Wet ground can also weaken anchoring.
- Spacing: Leave a clear route for players, balls and the coach between repetitions.
- Storage: Keep equipment flat, dry and away from high-traffic areas.
A short maintenance routine prevents small faults becoming session problems. Rinse off mud, dry the frame or inflatable surface, inspect the base and chest plate, then repack everything. Coaches can use this injury-prevention equipment guidance when reviewing wider session risks.
For questions outside football equipment, Lake City Physical Therapy pelvic specialists offer a separate clinical resource. It cannot replace advice from the player's own clinician. Warm layers can also help young players stay comfortable while waiting their turn, but clothing never compensates for unstable equipment, poor spacing or weak supervision.
Buying Decisions, Maintenance Habits and Common Questions
Choose by height, base, construction and storage. A small club may start with one senior or junior mannequin and add units only after the drills become a regular part of training. Supporting equipment such as rebounders and mats can help build a layered session, while portable training equipment is useful when sessions move between venues.
For wider ideas about age-appropriate kit, training equipment for young players offers another planning resource.
Common questions
How many does a small club need? Start with one for technique, or three for a basic staggered wall. Add more only when the coach can use them meaningfully.
Are junior models worthwhile if senior sessions dominate? Yes, if younger players regularly share the equipment. They give children a more suitable visual barrier.
What should I do with a damaged inflatable? Remove it from use, dry it fully and check whether the manufacturer supports repair or replacement parts. Don't rely on a leaking or unstable unit.
How should mannequins spend a UK winter? Clean and dry them before storage, protect plates and frames from damp, and keep inflatables deflated in a cool, dry place away from sharp objects.
SoccerWares offers training essentials including goals, rebounders, indoor training mats and related performance equipment for clubs, parents and players. Visit SoccerWares to compare practical training options and build a free-kick setup that suits your age group, surface and session plan.